Holden Commodore VE Series 1, 2006 – 2007
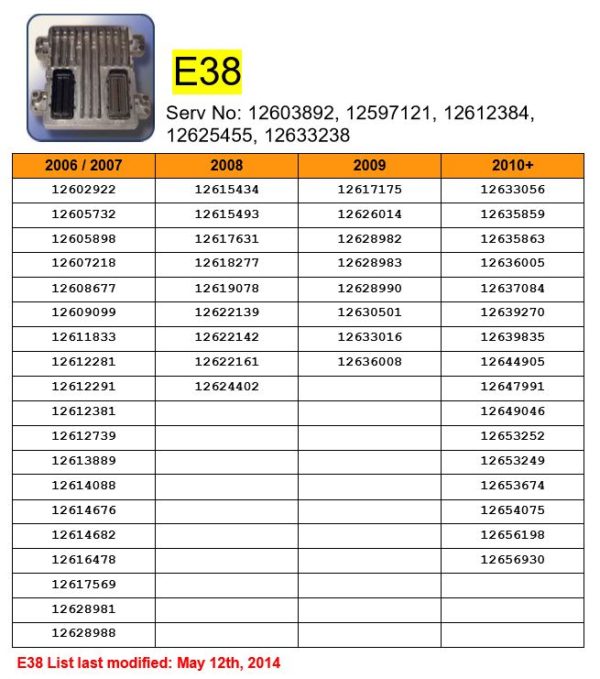
E38 – VZ & VE Holden Commodores with the L76 and L98 V8
Hardware/Service # (12597 121) – Silver Throttle Body
other service numbers 12597121, 12603892, 12589297, 19210738 that can be used to replace the 121
System OS# 12612381 & 12624402
Calibration#
Holden Commodore VE Series 1, 2007 – 2008.5
E38 – VE Holden Commodores with the L76 and L98 V8
Hardware/Service # (12612 384) – Gold Throttle body
other service numbers ???
System OS# ??
Calibration#??
Holden Commodore VE Series 1, 2008.5 – 2010
E38 – VE Holden Commodores with the L76 and L98 V8
Hardware/Service # (12625 455) – Gold Throttle body
other service numbers ???
System OS# ??
Calibration#??
Wiring harness different from here down
Holden Commodore VE Series 2 & VF, 2010 +
E38 – VE & VF Holden Commodores with the L76 and L98 V8
Hardware/Service # (service number ending in 238) and into VF Commodore
other service numbers ???
VE S2 – L77 6.0L V8 – HW# ending 238 System OS#12639270 – Calibration#92252500
??
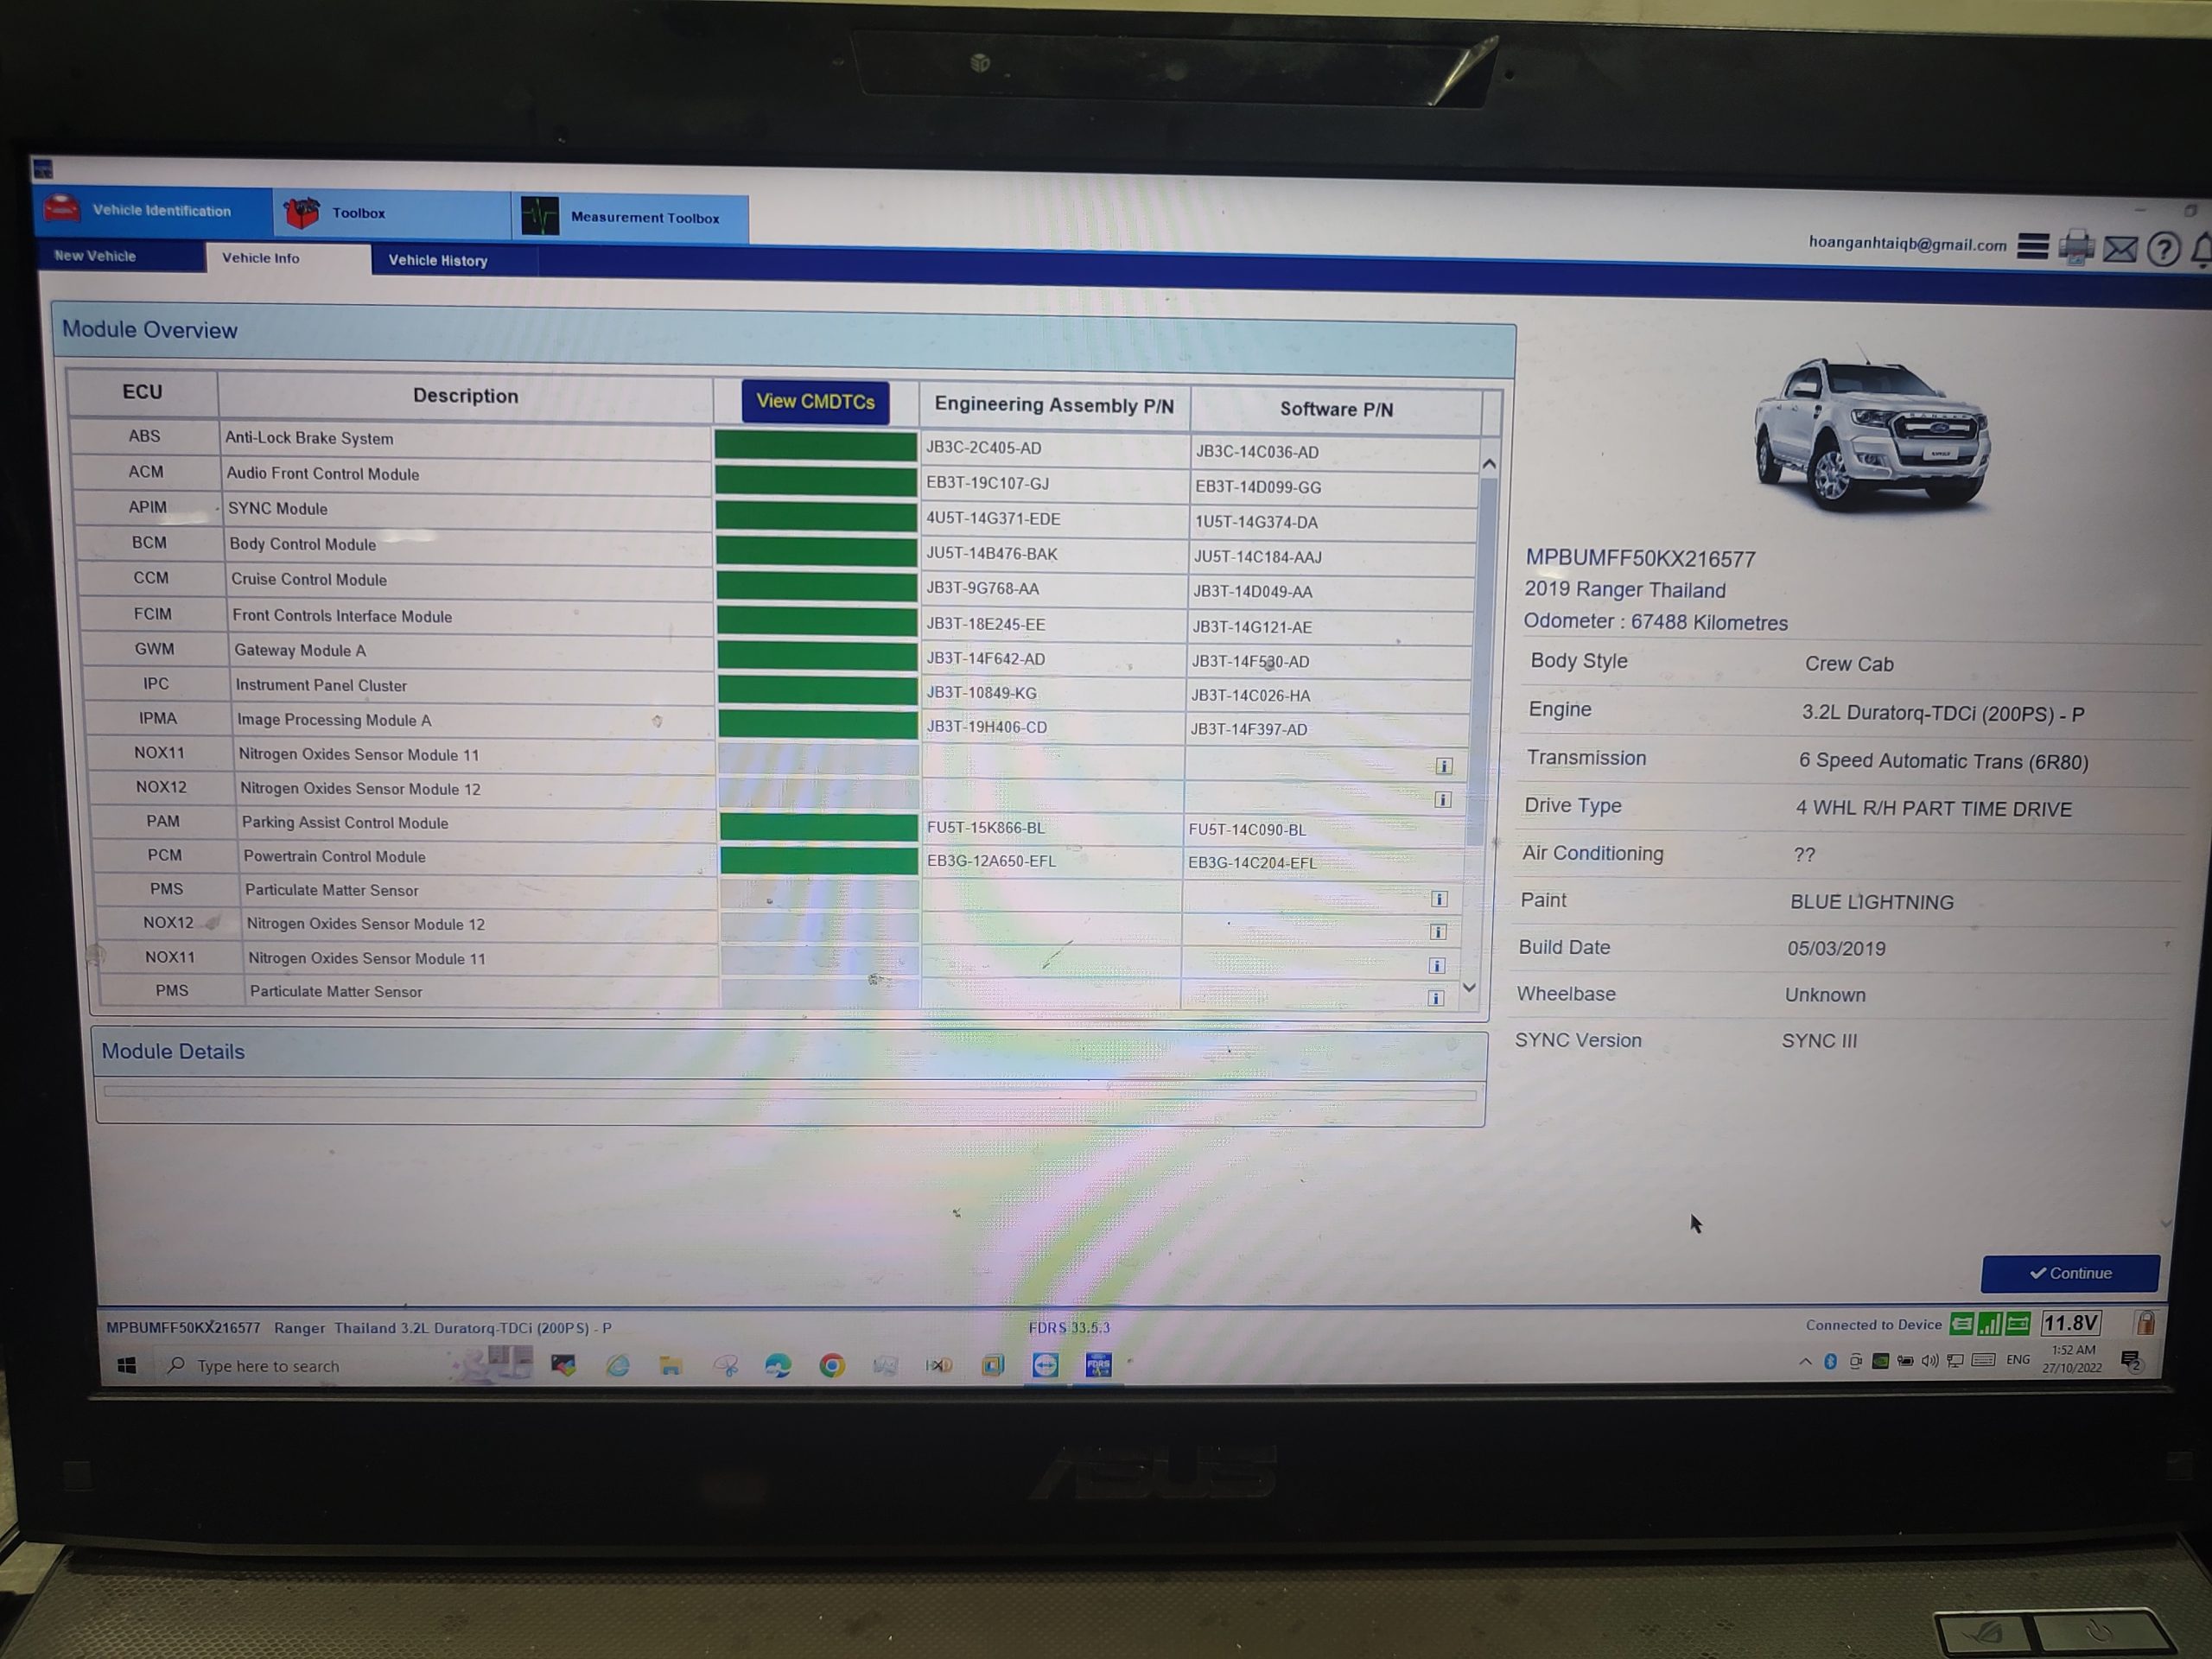
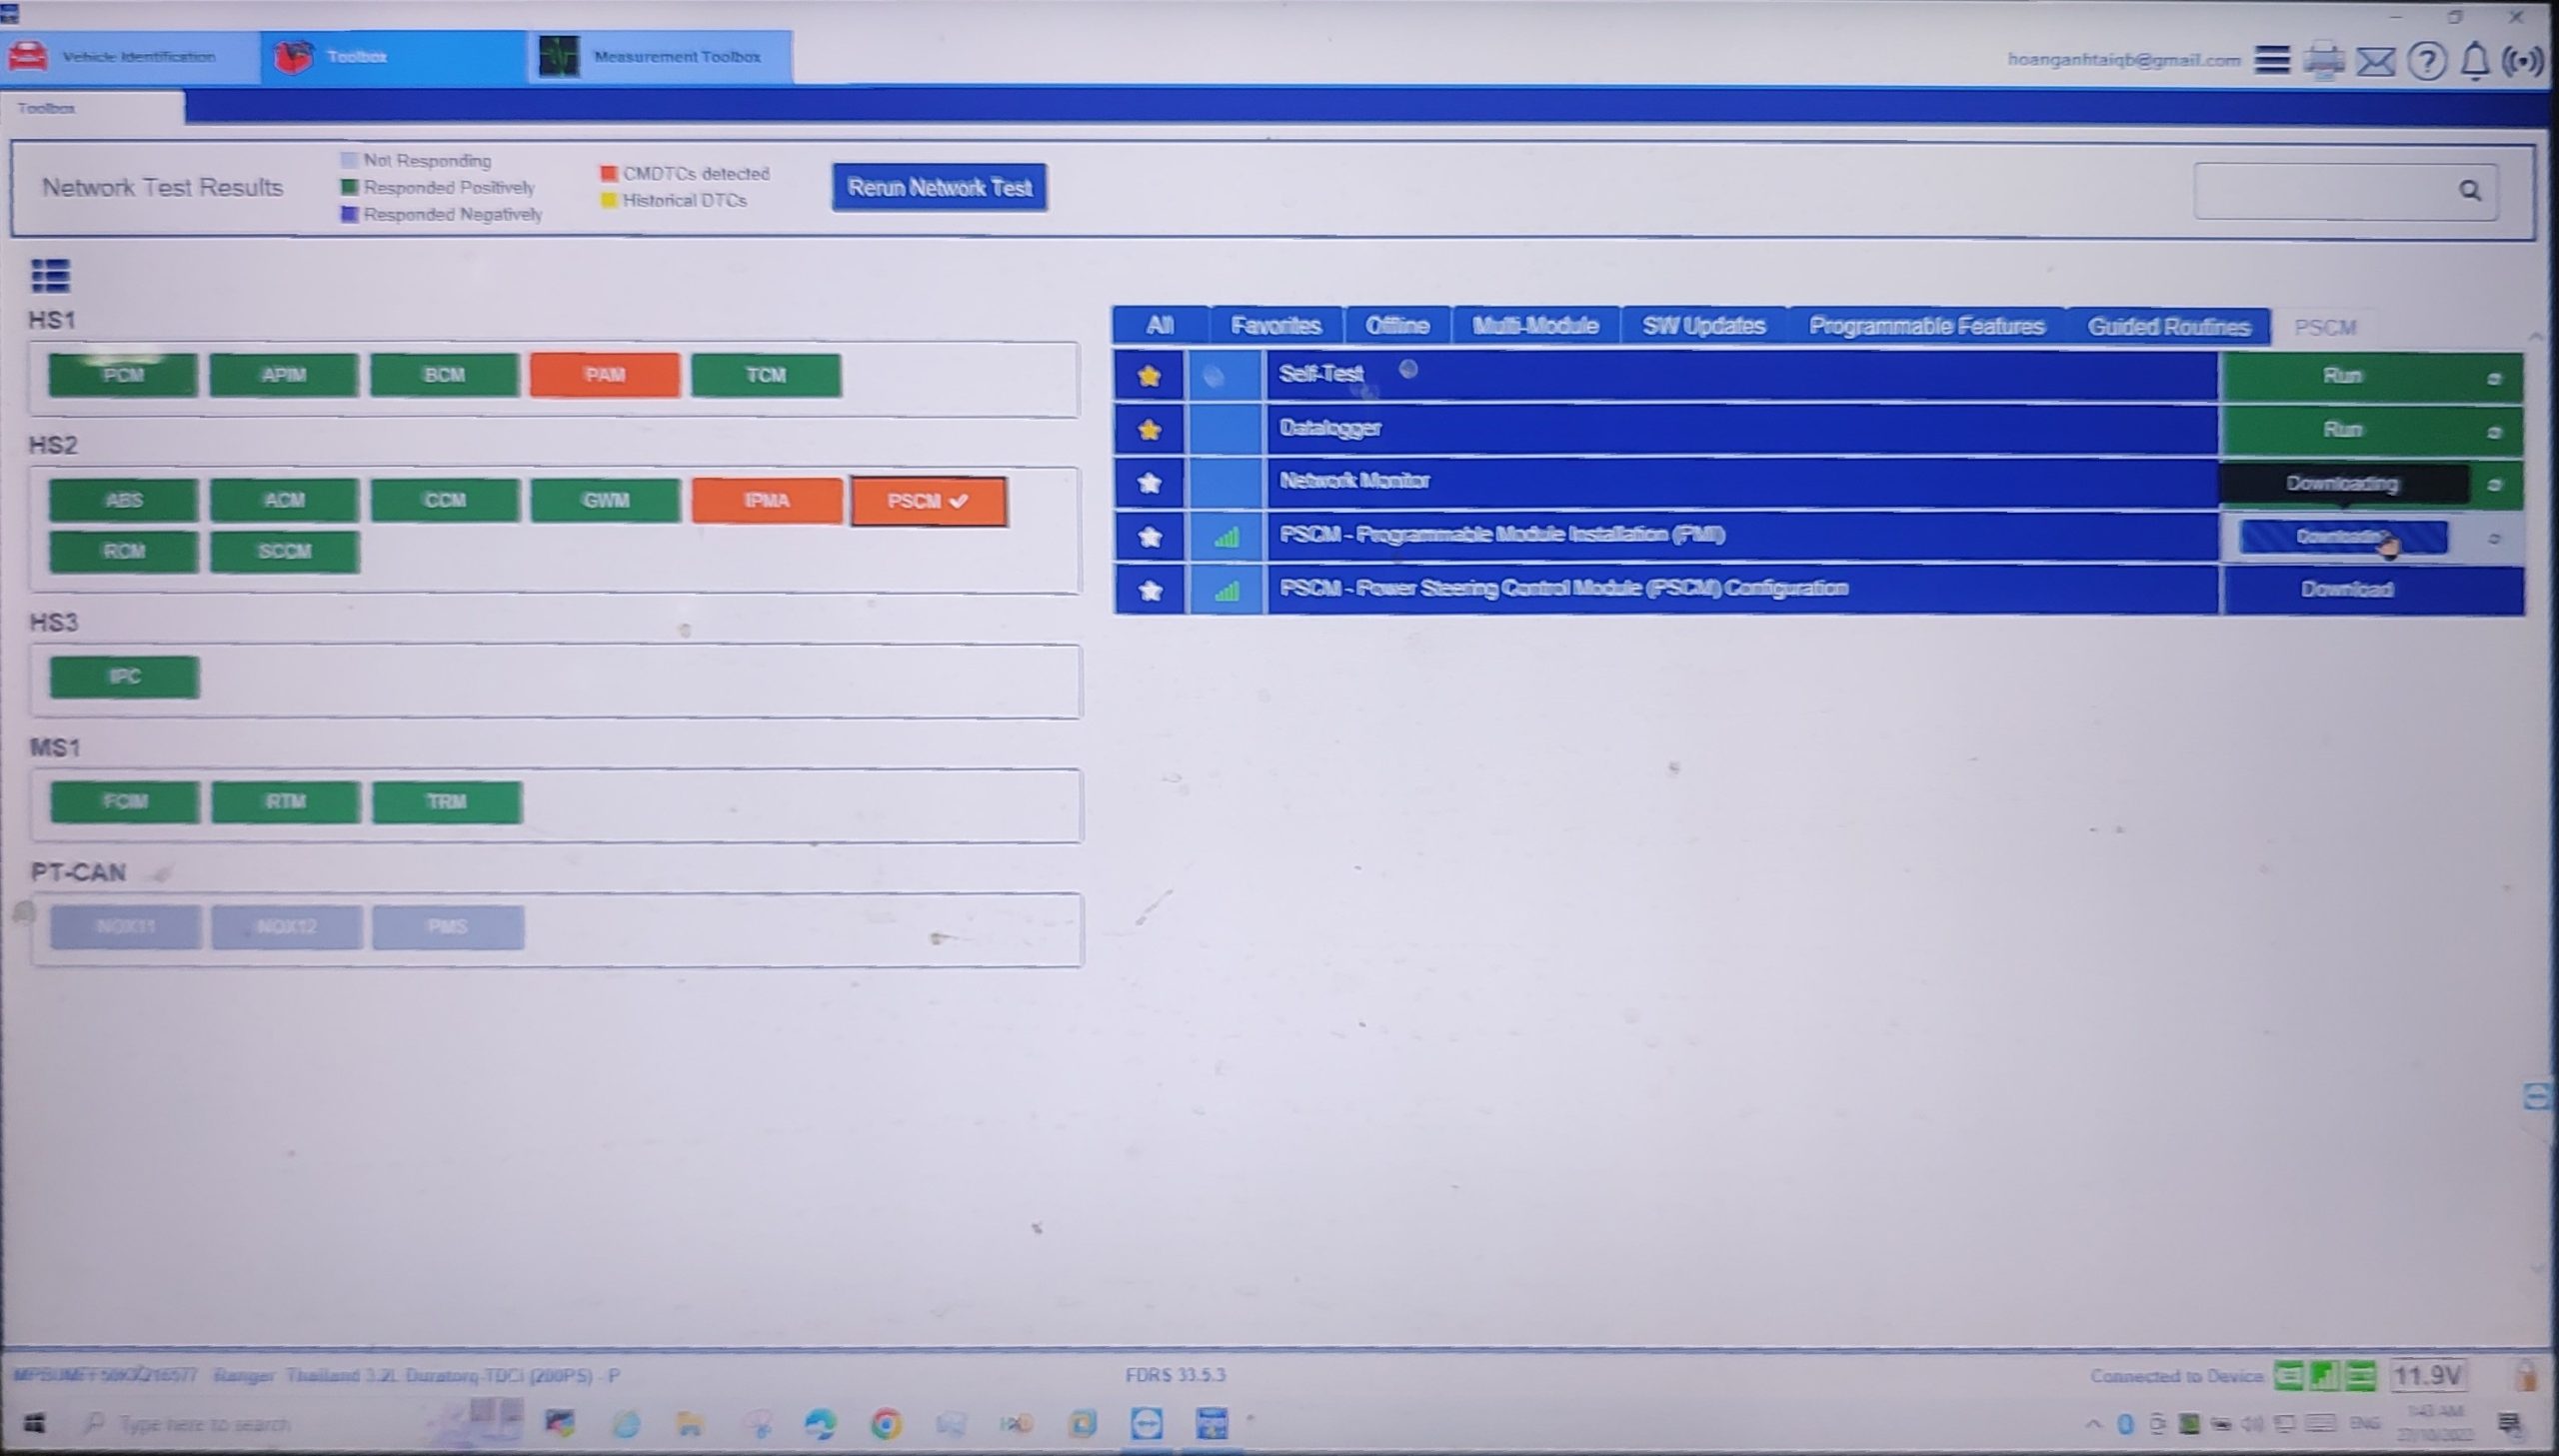
been here before where you can’t program are you an electric steering rack on a new unit on a Ford Ranger you think you gonna put some as-built data in there and makes it work now you need to get online and you need to program it
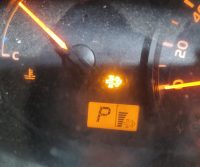
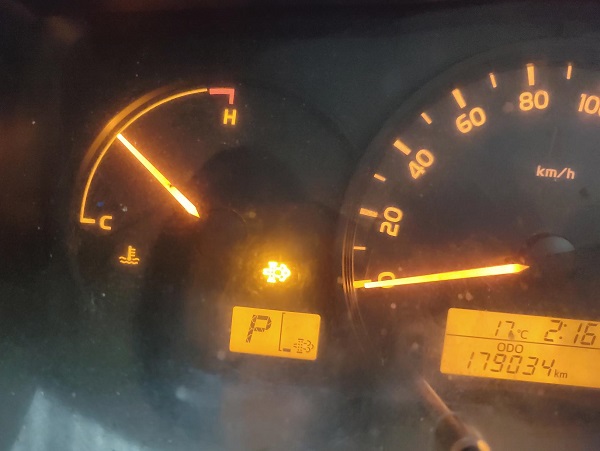
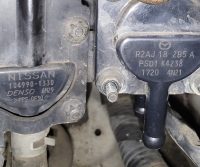
had the pleasure of working on this guys with a DPF issue showing on the instrument cluster with a bars to high could this game still on there now funkos so up the car DPF light flashing a look at the temperature probes don’t find anything wrong has to go have a look to see how we can couple DPF out nothing we work so then we have to do is we had to put a 200 resistor on the exhaust temperature bank 1 sensor 3 press the DPF button and wait for it too just happen
the particulate matter accumulation radio ratio and all the way down to 14% and still watching the catalyst differential pressure is almost .02 kPa difference the particulate filter differential pressure 1.3 kPa and has not changed it looks like the trick with a temperature probe shorted with 200 ohm resisters really works
I’m waiting waiting by dick out matter accumulation ratio down to 4% and waiting for it to hit 0 and I’m hoping that the lot now down to 2% to 0% and I want the system to then self shutdown what I ended up having to do was stabbed my foot on the accelerator the minute I did that and the DPF mode came out the check engine light and DPF light stop flashing when out and the RPM can back to normal RPM speed therefore this thing is now solved
I then switched off ignition so the vehicle then stop stop the engine and then turn the ignition back on and I watched the exhaust temperature bank 1 sensor to drop from 700 all the way down to 81.2 that temperature is the same as the exhaust temperature bank 1 sensor 1 the exhaust temperature bank 1 sensor 3 is still at 742.5 degrees with ignition on as it has a 200 ohm resistor what im going to do is run the vehicle and see what happens because it looks like the whole lot is done by a mathematical equation and not differential pressure sensor being the only thing making the system be more blocked so to speak but then proceeded to River up the vehicle to 2000rpm watch the temperature exhaust sensor bank 1 sensor to go from 81.2 degrees all the way up to 450 and then I slowly let the RPM off and it’s slowly decreased all the way back down to 81.2 the particulate matter accumulation ratio is still at 0% so it looks like this is actually going to work leaving it in there I really like to see what happens with the vehicle in a couple of weeks time
In the Workshop As I’m Writing, sitting in a bay is a lovely Mazda 3 BL, Diesel in the shop this week and it has a DPF pressure sensor that is going Haywire 1 minute it’s at 200 kPa next minute it’s at 5 kpa can’t make up its mind when it gets hot.
A Call to Mazda to find out how much one and was and they said it was $1,500 which, you know me I told them I would not RIP off My Client and that price was absolutely stupid.
So we started to adapt different units to it to find what works and what doesnt work. Later model rangers and mondeos have a different plug but we tried 34kpa is idle pressure ( way off the mark ) after that rang every wreckers I knew and to no avail only a new unit on AliExpress for $250 we know that’s going to be a long wait, ( not giving up yet)
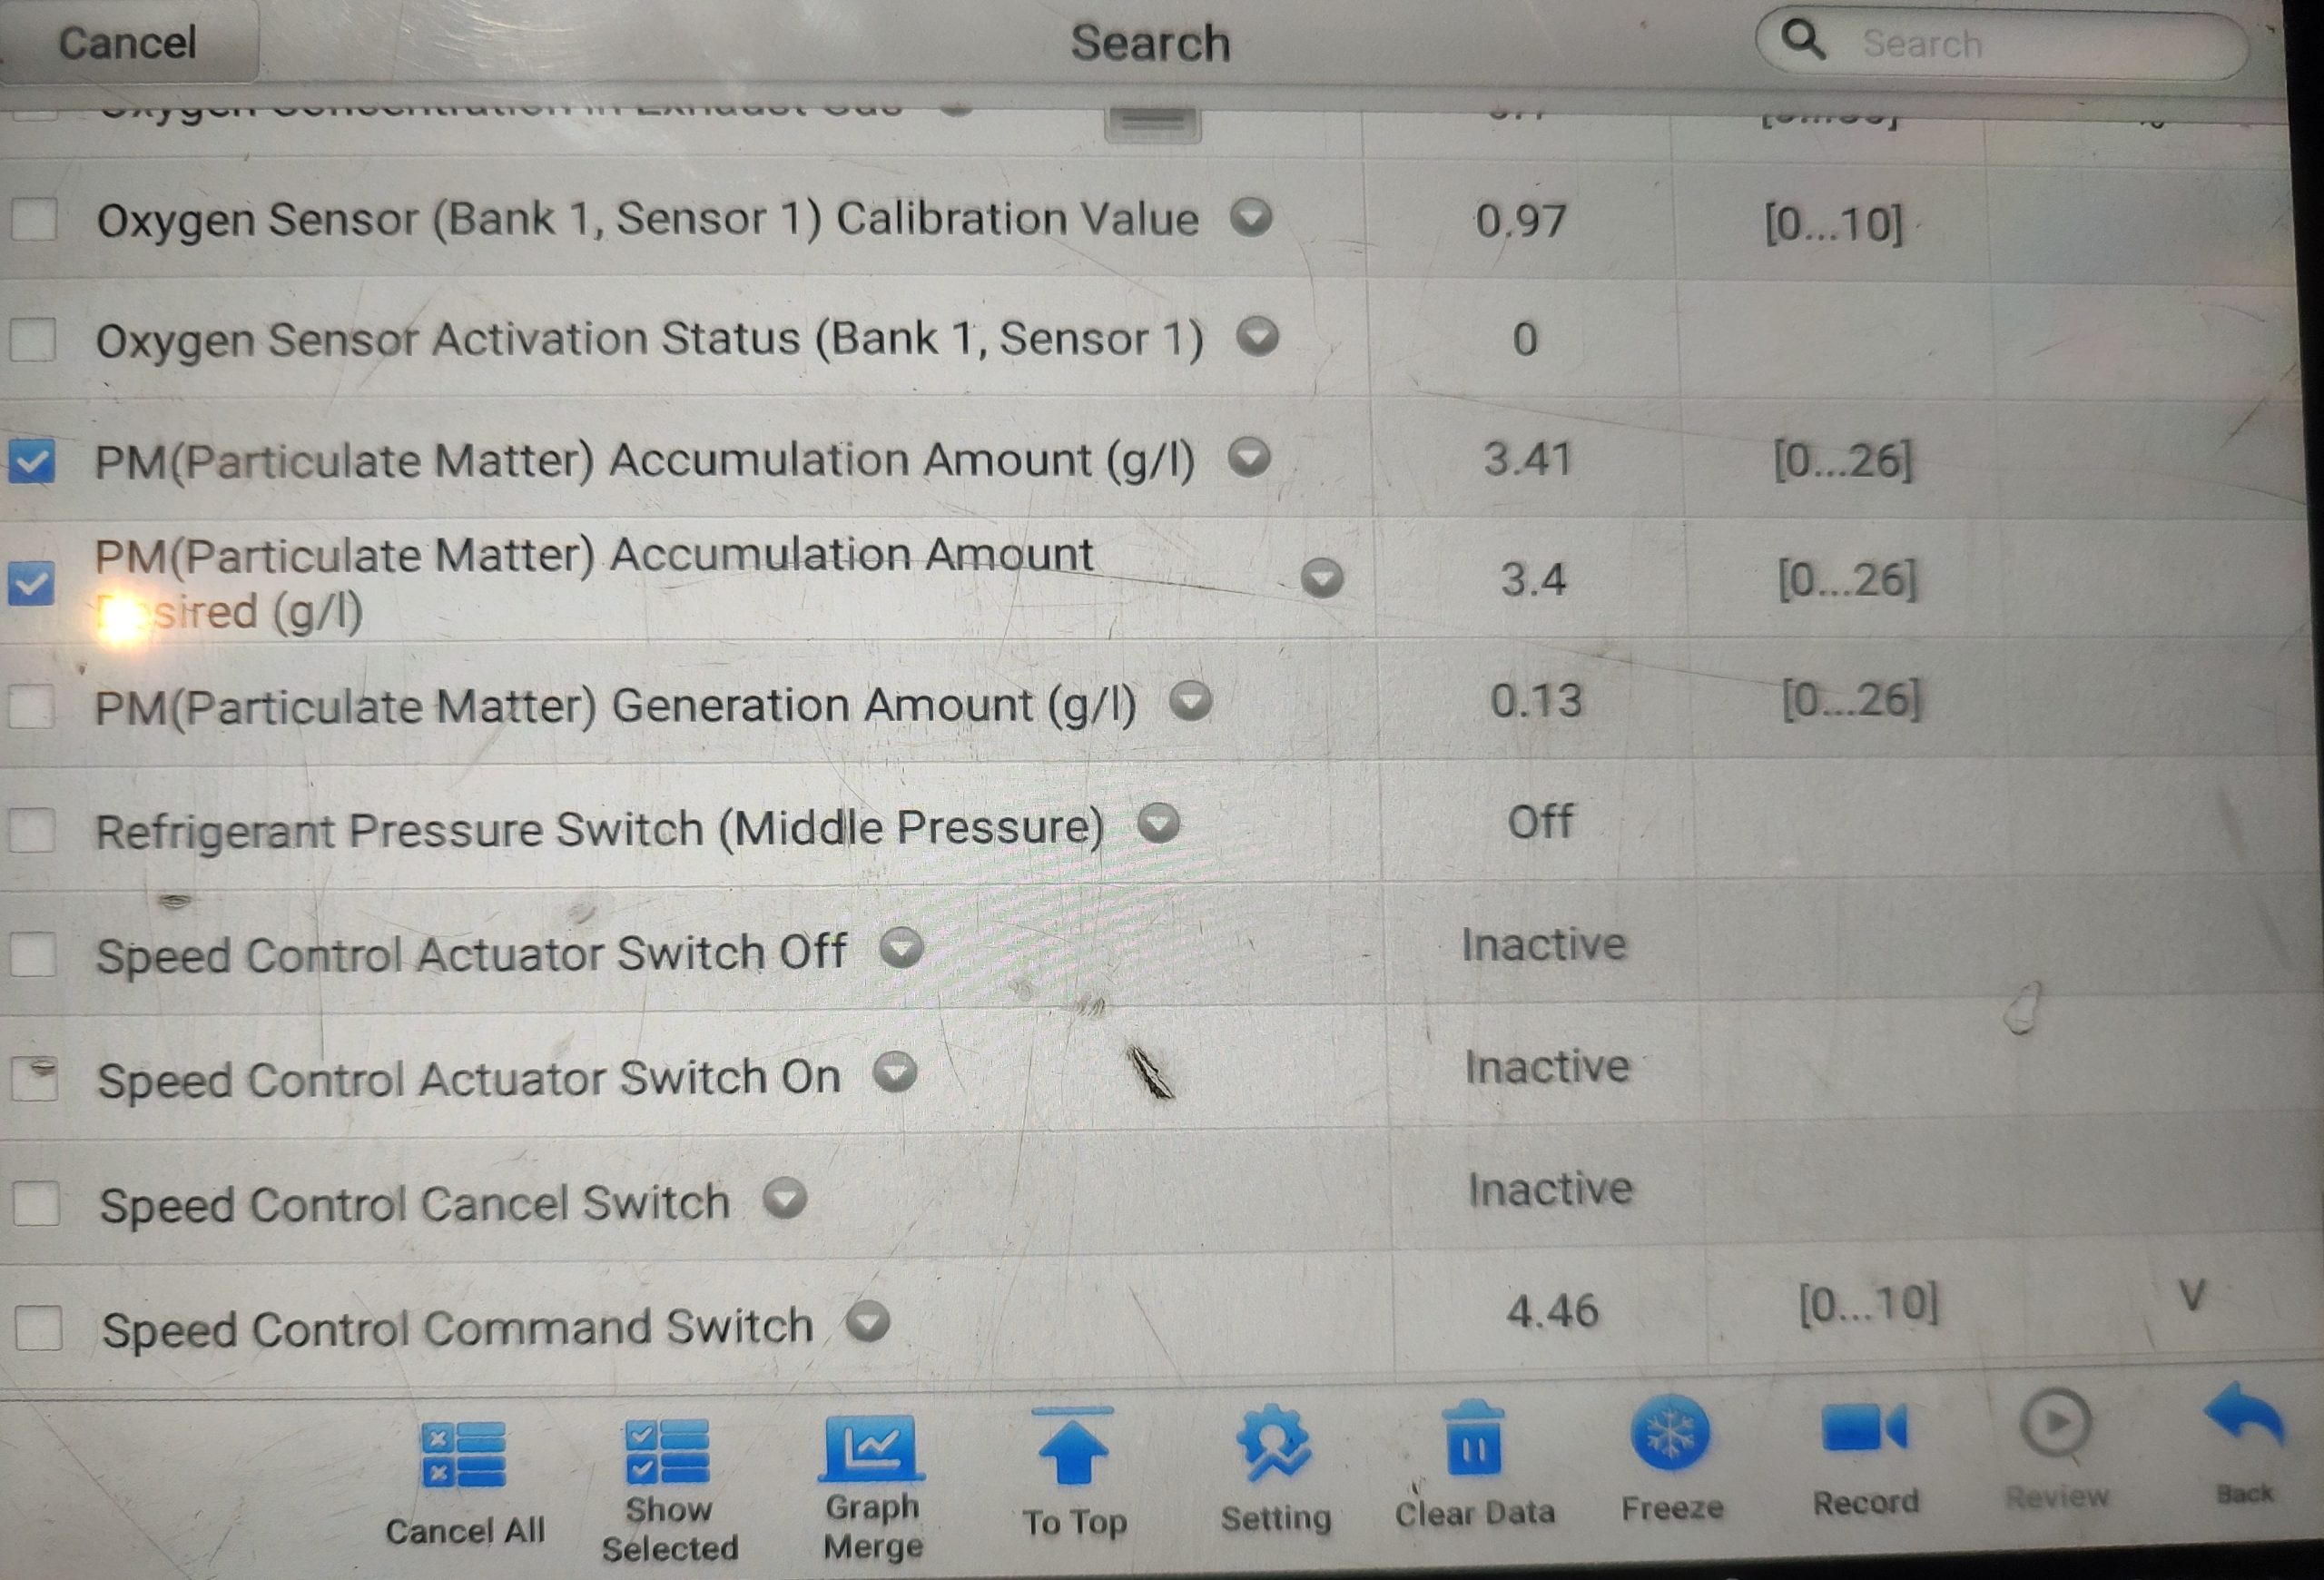
Monday night came a few things to finish off for the day, Working on a Nissan Navara D40 ( Thailand Build ) came in for wiring repairs, looking in the engine bay and we found the same type differential pressure sensor both of which have different part numbers but the sensor fits in it’s identical comes on a different bracket that has the same functionality
Mazda 3 – part number – R2AJ182B5A $1500
Nissan Navara D40 – Part number – 104990-1330 – $155
same stuff right, swapped them over to find, Bingo!
Let the Testing Begin
The exhaust gas differential pressure kPa with the idle sitting at 1500 RPM is now 200 Pascal’s ranging from 1 volt to 1.01 volt to 0.990 Volt at idle I see an absolutely normal kPa differential pressure so had a quick look on the internet and found I can find a brand new Nissan Navara differential pressure sensor for $135 f*** you Mazda 1500 dollar piece-of-s***
Every Ones a Winner Here!!
Holden Commodore VE Series 1, 2006-2010 – 6.0L V8 – Throttle body and ECU part number notes before you start
3) E38: Keep to flashing files from these year groups to the service numbers listed:
wire harness Same on a) b) c)
a) 2006 – 2007 – E38 – VZ & VE Holden Commodores with the L76 and L98 V8
OS12612381 & 12624402 – Hardware/Service # (12597 121) – Silver Throttle Body
other service numbers 12597121, 12603892, 12589297, 19210738 that can be used to replace the 121
b) OS????????? – 2008.5 – 2009 – E38 – VE Holden Commodores with the L76 L98 6.0L V8
OS???????? – Hardware/Service # (12612 384) – Gold Throttle body
other service numbers???
c) 2009 – 2010 – E38 – VE Holden Commodores with the L76 L98 6.0L V8
OS???????? – Hardware/Service # (12625 455) – Gold Throttle body
other service numbers???
Wiring harness different from here down
d) OS????????? – 2010+ E38 (service number ending in 238) and into VF Commodore
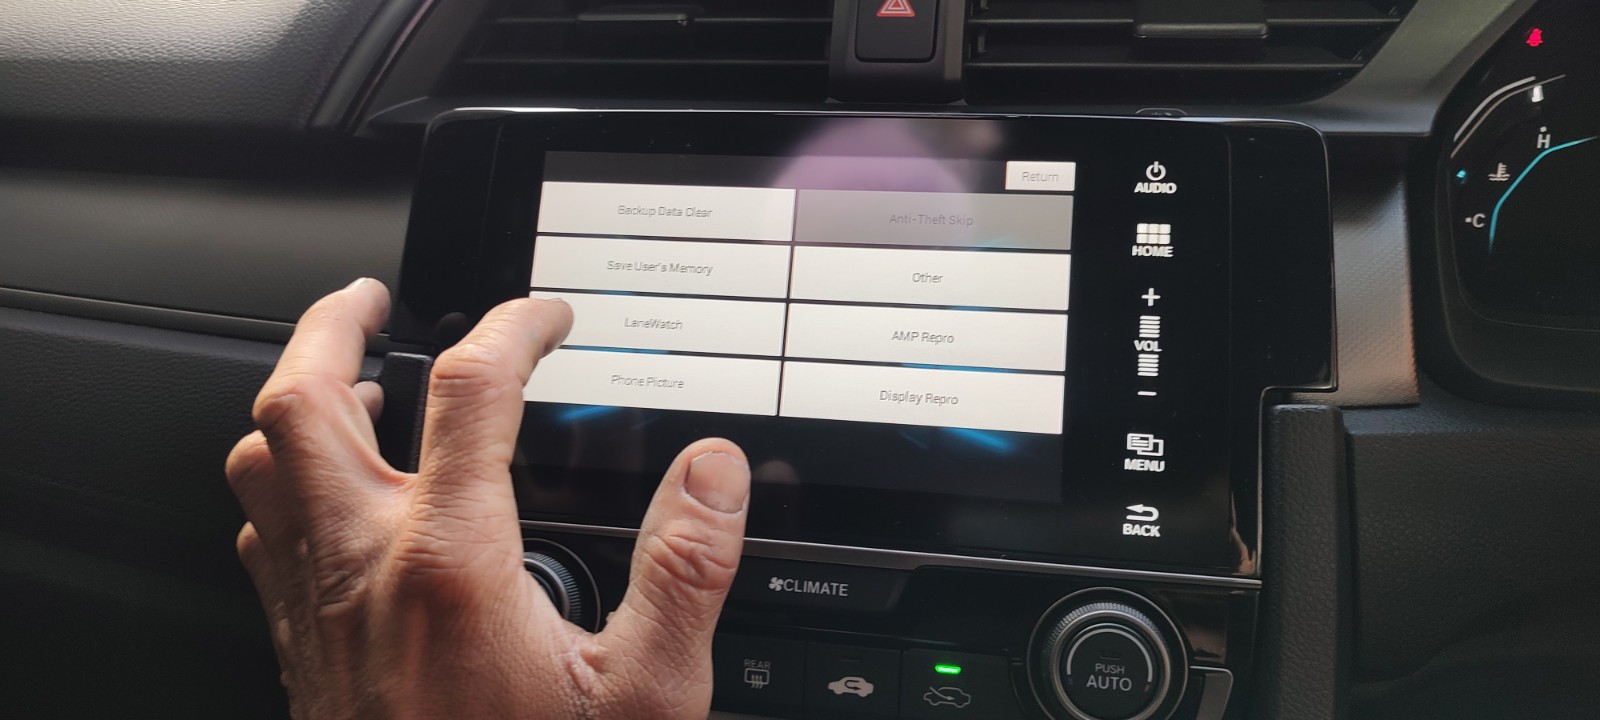
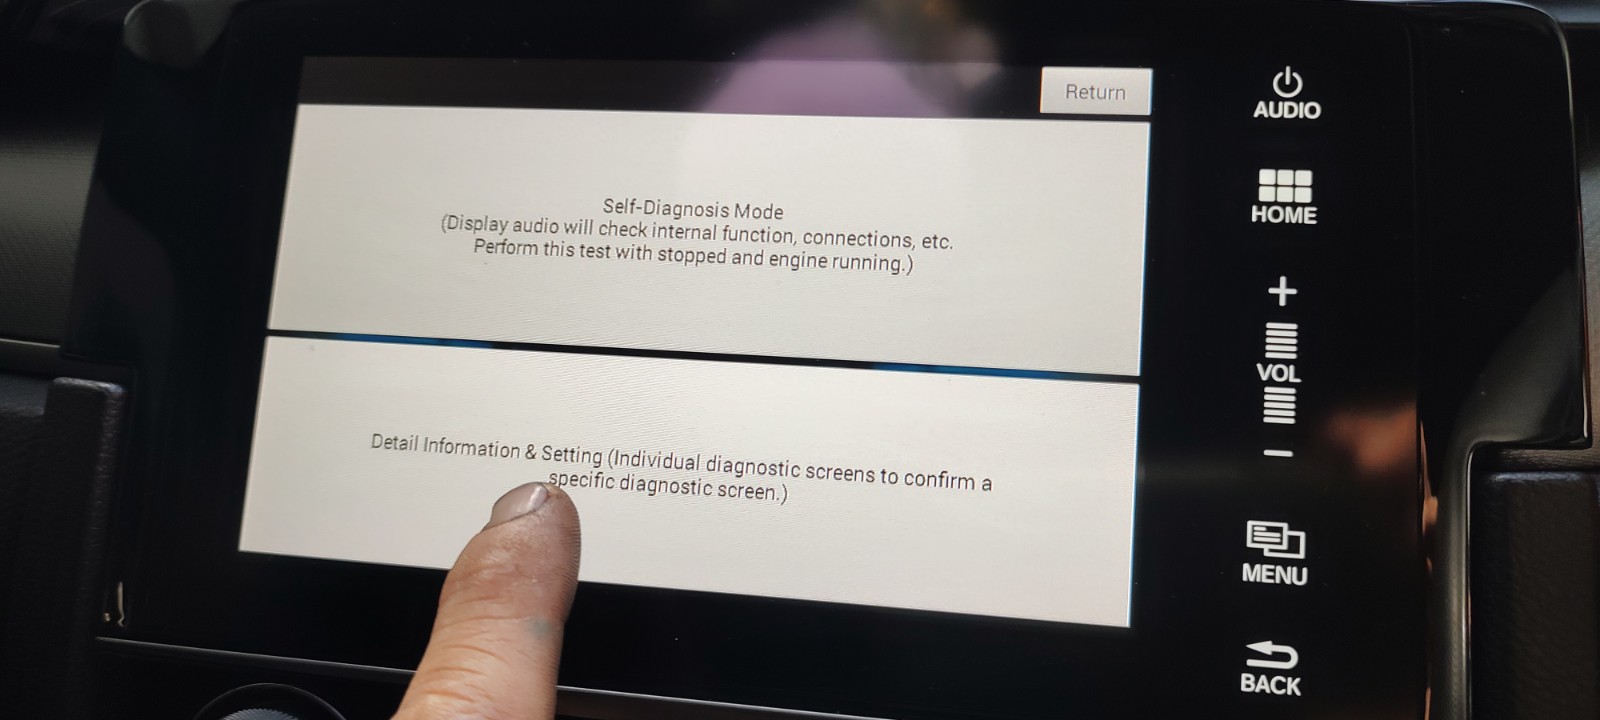
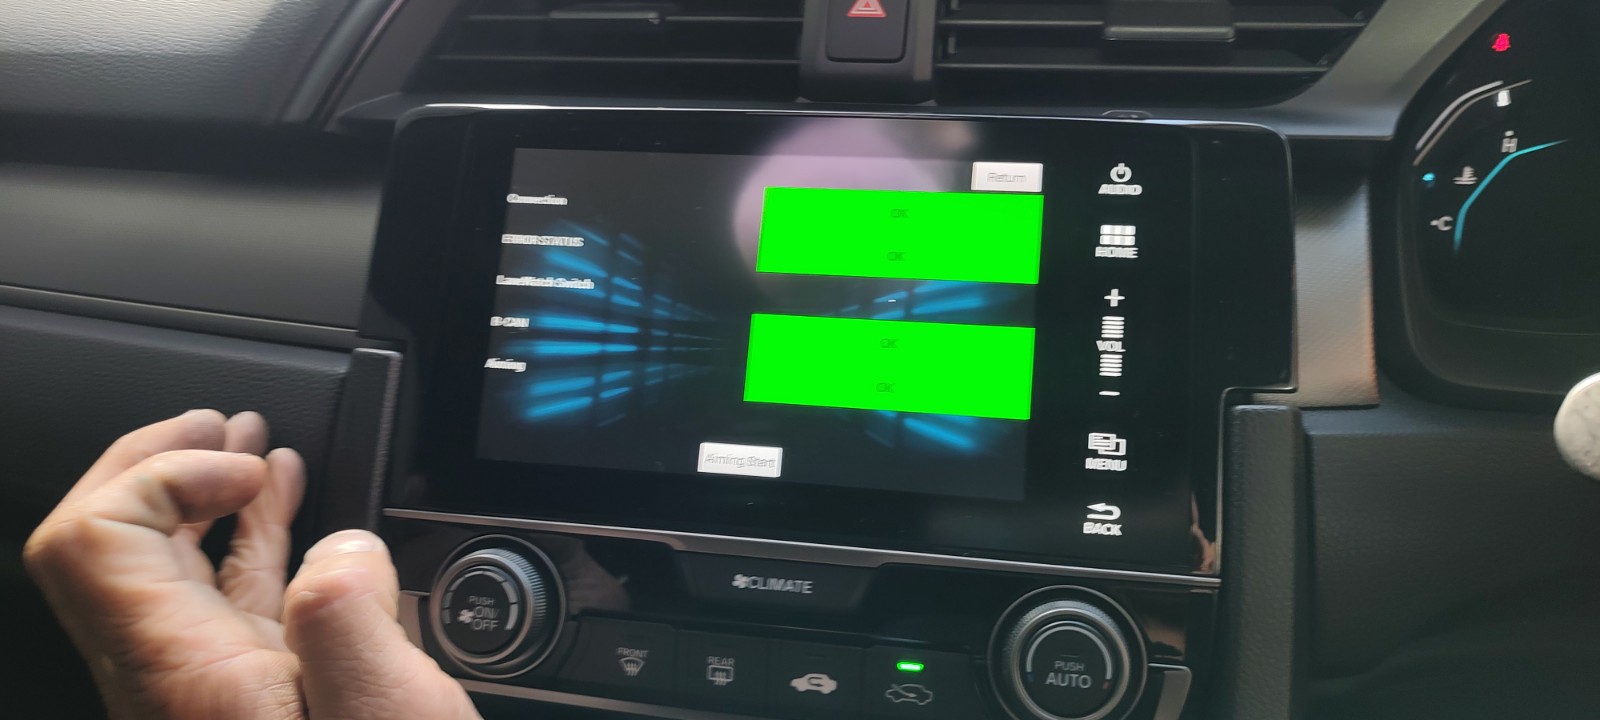
Read MoreResetting procedure – Park Assist Sensor
- switch to on mode and press parking button 10 times
- switch ignition off
- hold the parking button on and switch ignition on wait until a wired/ long beep noise is emitted though stereo and then it is done.
- ignition on and off to test and make sure the green light stops flashing
How to Set Radio Mirror for Left Blinker

Every now and then a vehicle comes in with a weird issue that you have to be creative and work out a new test method for working out the plan for repair,
The vehicle, came in with a fault code
P0340 Intake camshaft position (CMP) sensor ‘A’ circuit (Bank 1 or single sensor) Pending
the vehicle when cold would start and then stall, if restarted the vehicle would fire up and run with no issue at all,
Live Data was checked and it was foudn that the Live Data Pid for cam synchronisation would say yes and then in the next framde say no, which ment the vehicle, cut fuel and shut down, This was captured.
To confirm this the lab scope was brought out to confirm what was happening on the ECU Processed live data was what was HAPPENING AT THE sensors.
The Scope data revealed that the intake cam shaft missed a pulse output during cranking the first time it had not been started for more than 2 hours.
below the picture shows the differences, between starting and stalling and starting and staying running.

What to do next is Strip the engine down and inspect the timing chain and cam phasers and retest.
The First block i saw being cracked was a FPV FG F6 (Falcon Barra Engine 6 cylinder in an FG Falcon)
This Engine – Ford BF Falcon GT FPV GT (For Those GUY’s) had been rebuilt many times over now, the last time was done by us and so much corrective action had already been undertaken.
Read Morealyways annoyed that you cant find the info on how to test this stuff people never post in plain english
so heres what i know
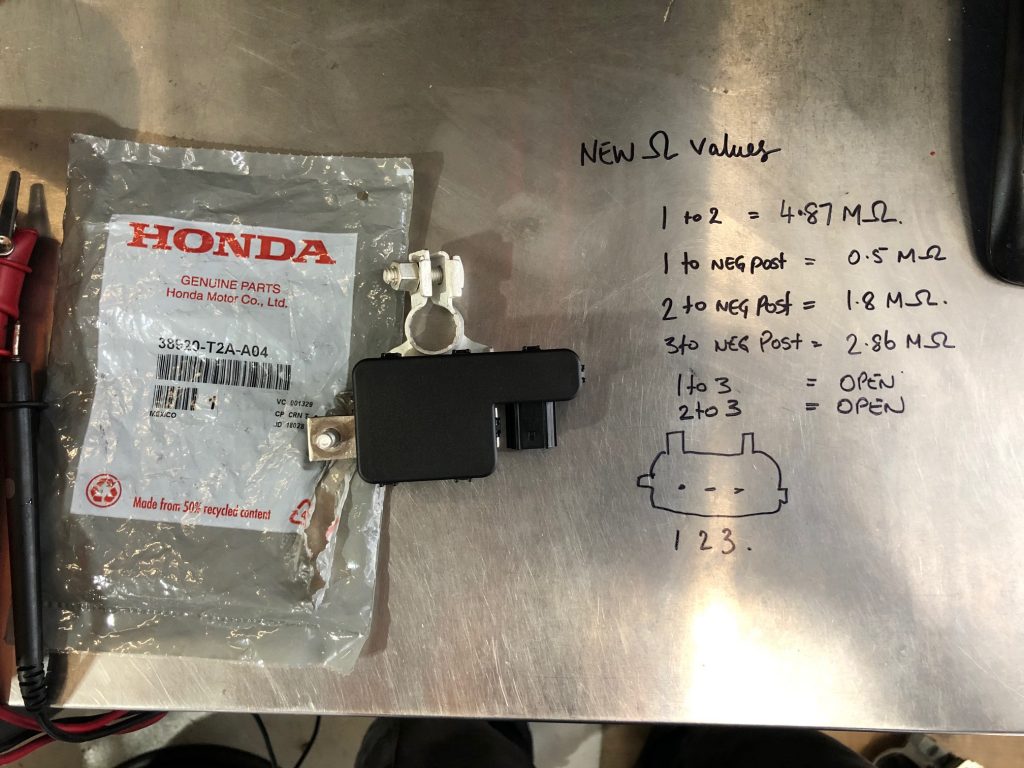
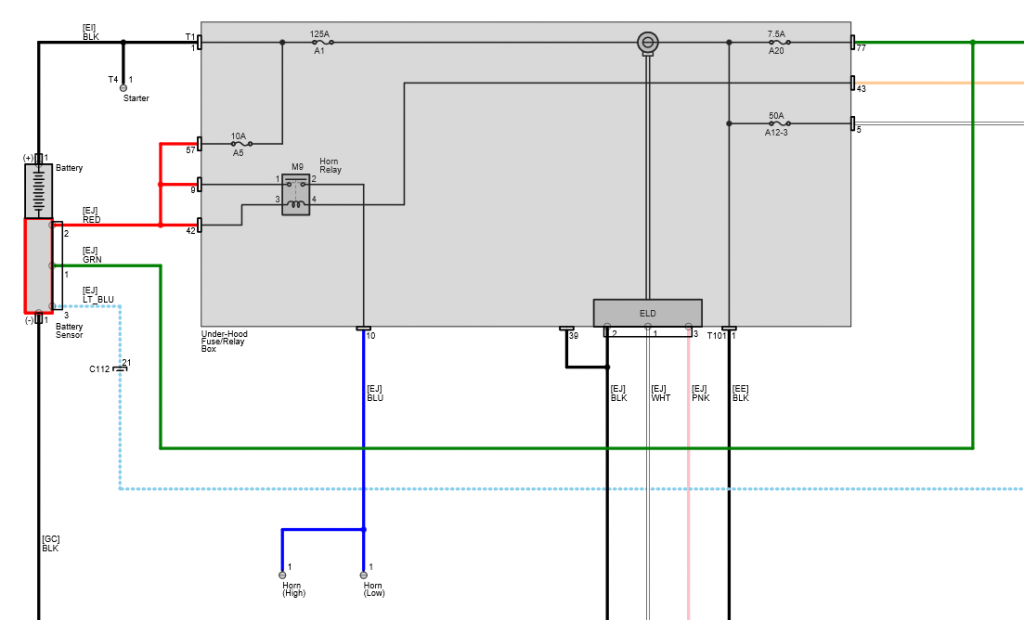
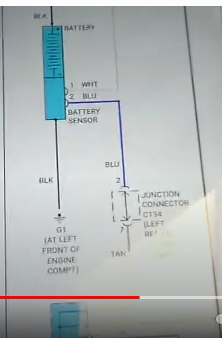
P154A (battery sensor internal failure) stored. In this case, the battery sensor has an internal failure and must be replaced.
here is the test steps
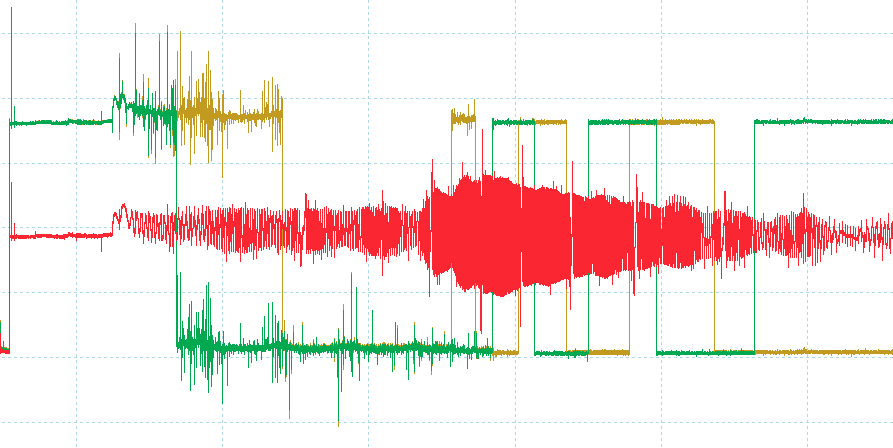
pin 1 blue = lin bus square wave
pin 2 red = battery voltage
pin 3 green = faint ground signal
yellow at alternator same as blue wire
SENSOR NOW WORKS WHEN THE HEAD LIGHTS ARE TURNED ON ONLY
THE BATTERY VOLTAGE IS NOW AT 14.3V
ELD VALUE IS 213.5 AMPS
BATTERY CURRENT SENSOR IS 15.7AMPS
WHEN HEAD LIGHTS ARE TURNED OFF THE BATTERY VOLTAGE GOES DOWN TO 12.3VOLTS NO OTHER WAY TO GET VOLTAGE UP
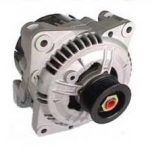
TST DRIVE VEHICLE TO CHECK ALTERNATOR VOLTAGE OUTPUT
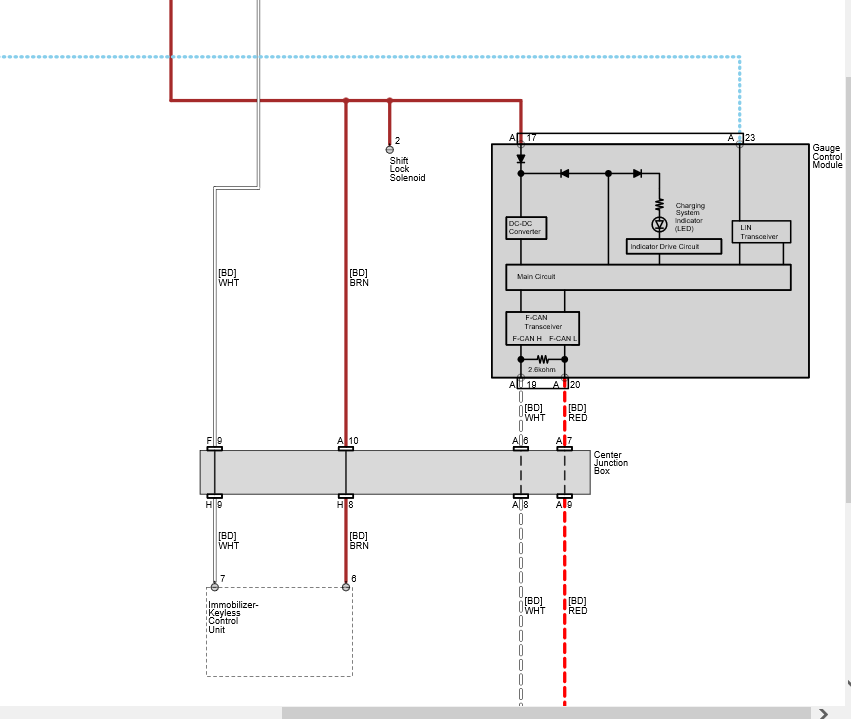
WIRING DIAGRAM
both square waves will be the same
if not the same wiring issue
if the same alternator is not charging then the alternator is no good.
if the alternator is charging and the signals the same the sensor is no good.
Wiring on the sensor its self
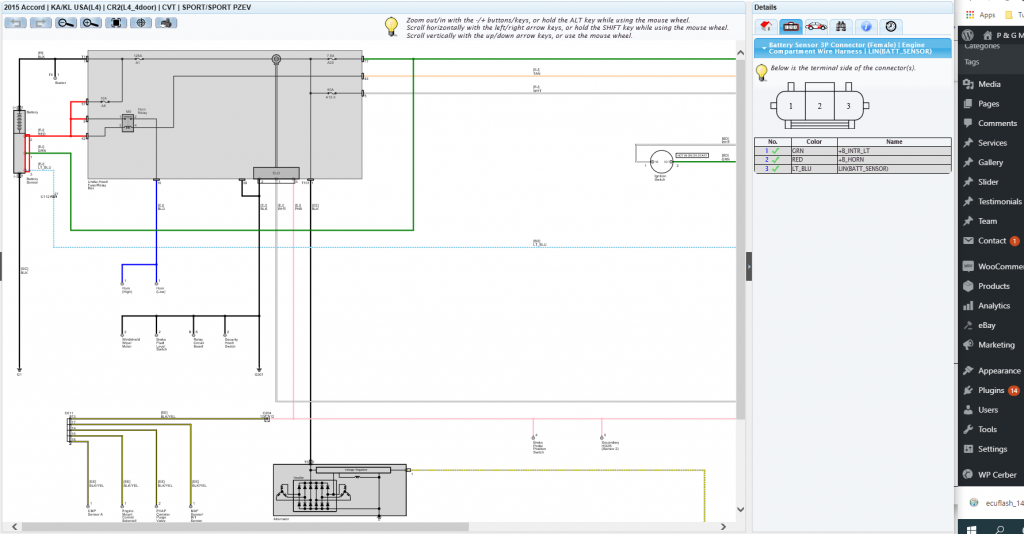
Honda battery sensor – resistance testing with sensor out of car – this was not correct for my vehicle unless the plug is up side down (we are in Australia)
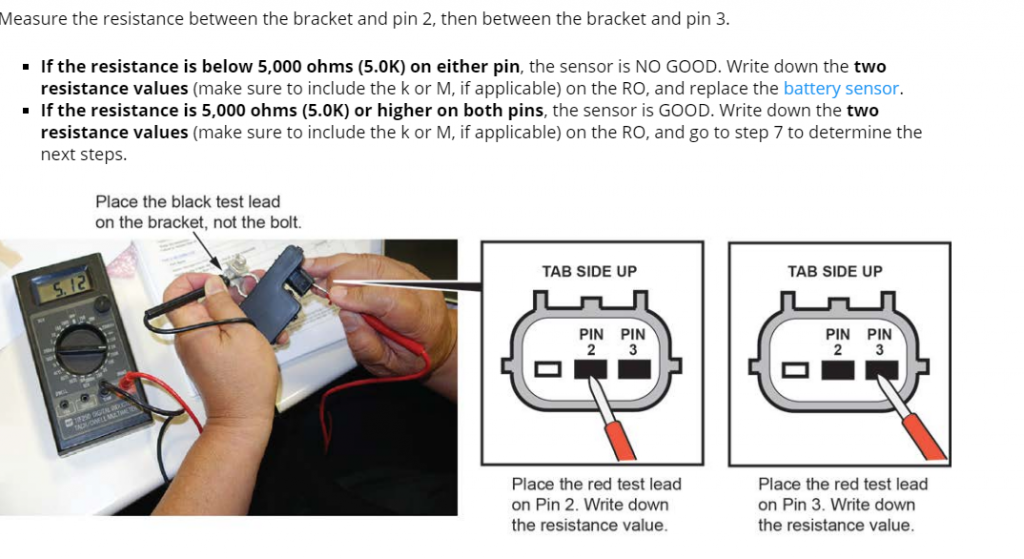
i have 2.75M ohms on both pin 1 and pin2 ??????????????????????
After all that here is what I have measured when I bit the bullet and bought a new one